Concrete Pump Parts Knowledge
How to Prime a Concrete Pump Line: Preventing Dry Packs at Startup
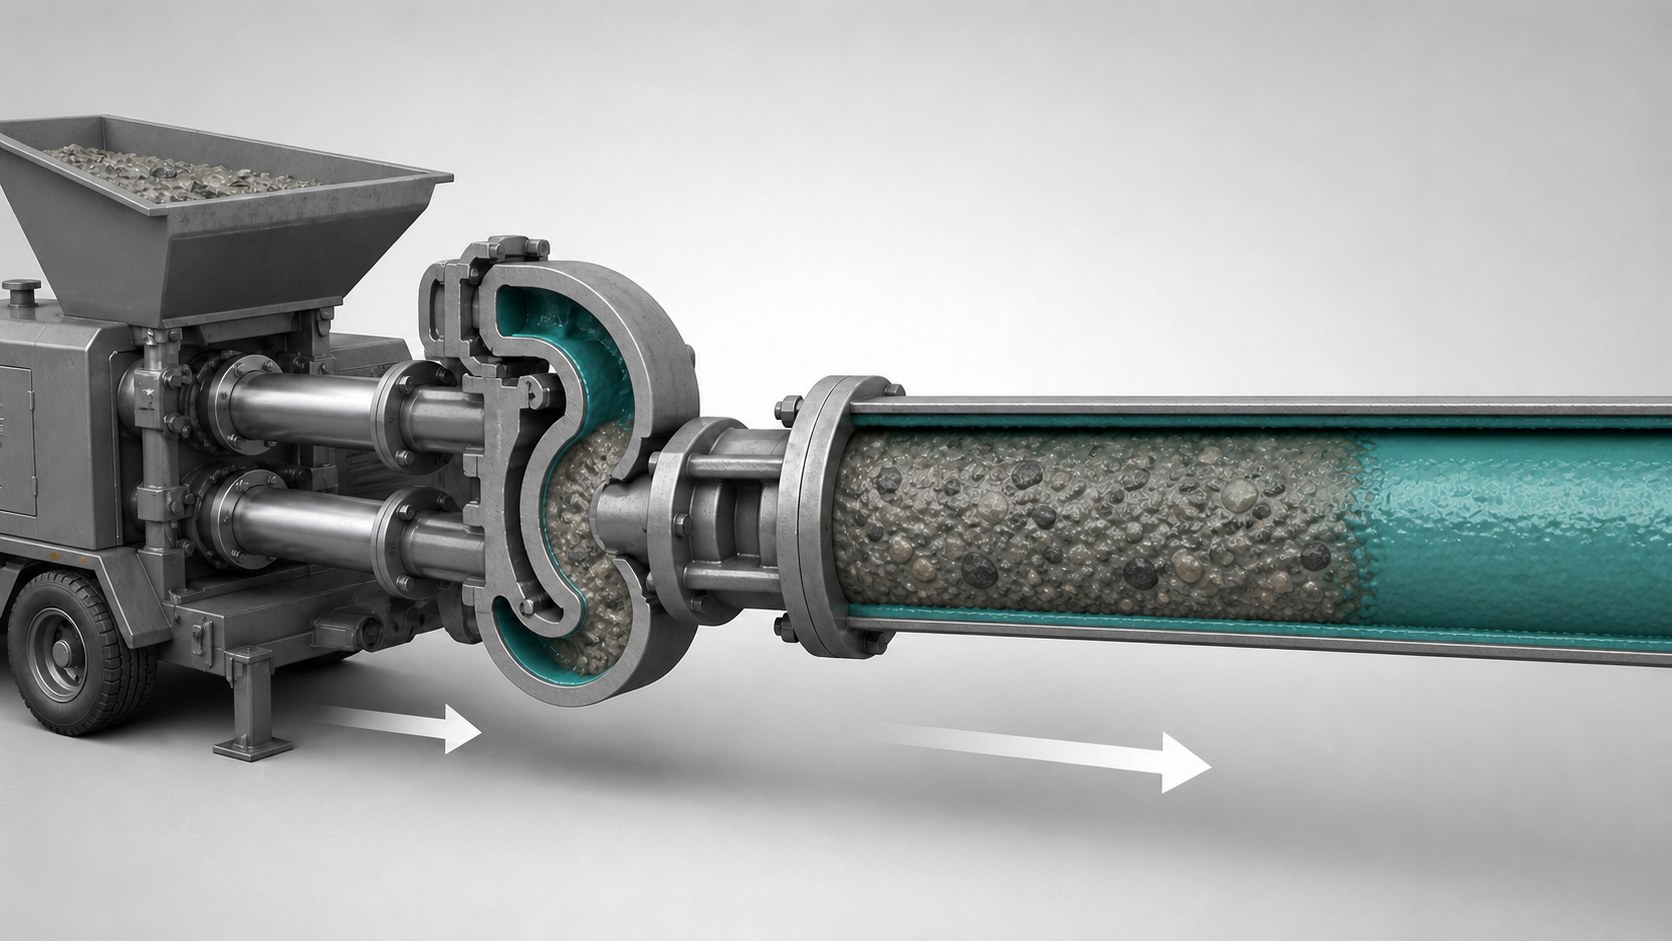
A concrete pump line should be primed before the first production concrete enters a clean delivery system. The purpose is specific: place a compatible lubricating material against the internal surfaces of the transfer valve, outlet, pipes, bends, reducers, and hoses so that the leading concrete does not lose the paste it needs to remain pumpable. A poor prime can produce a dry pack before normal pumping has even begun.
This is not a universal recipe. Primer type, quantity, loading point, pump speed, and startup sequence depend on the pump, line arrangement, concrete, and primer manufacturer. The pump operator should follow the applicable OEM manual and site procedure. The engineering principles below explain why those instructions matter, what a crew should observe during the first strokes, and how to separate a priming problem from a mechanical fault.
Priming material and the concrete lubrication layer are related, but not identical
During established pumping, concrete does not move through a pipe like water. Research on full-scale concrete pumping describes a coarse-aggregate-depleted layer near the pipe wall. This layer behaves more like the mortar fraction of the concrete and has lower flow resistance than the bulk material. Much of the deformation is concentrated in this thin annular region while the concrete core moves more like a plug.
That layer develops while suitable concrete is flowing. It is not reliably present in a clean, dry line before the first stroke. Startup primer temporarily fills that gap. It wets the wall and provides a mortar-rich or purpose-designed material ahead of the first concrete, reducing the chance that the dry system will strip water and fines from the leading edge.
This distinction prevents two common misunderstandings. First, pipeline primer does not replace the mechanical grease required at bearings, shafts, or other lubrication points. Second, primer is not normally intended to be blended through the production load as a concrete admixture. Its job is to travel ahead of the concrete and condition the delivery path. Product instructions and project requirements should determine how the discharged primer and leading concrete are collected or disposed of.
Why the first load can plug a dry line
The front of a pumpable concrete mix contains coarse aggregate suspended in mortar. If that front meets an unconditioned pipe wall, some of its water and fine material can be left on the steel or rubber surface. The remaining front becomes locally deficient in mortar. It may still move through a straight section, but a reducer, bend, coupling transition, or hose can give the coarse particles an opportunity to interlock.
The result is often described as a dry pack. Pressure rises because the pump is pushing against a compacted, poorly lubricated mass rather than a continuous pumpable column. Multiquip operating guidance explicitly links inadequate preparation to dry packing in the shuttle-valve tube or delivery line. REED manuals similarly describe priming as coating the S-tube and delivery system before ordinary concrete is introduced.
Leakage can create the same problem from another direction. A damaged gasket or loose coupling may allow water and cement paste to escape while retaining coarse aggregate. The line can then plug even if enough primer entered the hopper. This is why a pre-pour clamp and gasket inspection is part of priming, not a separate cosmetic check.
Choose the method from approved instructions, not habit
Three approaches appear commonly in manuals and on jobsites: a cementitious grout or mortar, a proprietary pump-line primer, and water alone. They should not be treated as interchangeable.
| Method | What must be confirmed | Main decision risk |
|---|---|---|
| Cementitious grout or mortar | OEM-recommended proportions or an approved project mix, required volume, mixing quality, loading point, and disposal route | Lumps, insufficient fines, or too little material can defeat the prime; the grout may not be acceptable in the finished placement |
| Proprietary pump-line primer | Product identity, water quantity, mixing and hydration time, line capacity, equipment suitability, and discharge instructions | A sachet size or seller claim does not prove that one batch suits every line length, diameter, or layout |
| Water only | Whether the specific OEM and site procedure permit it, and how the water will be kept separate from production concrete | The American Concrete Pumping Association states that water priming is not recommended in most cases because water alone does not provide the same cementitious lubricating material |
A packaged primer can reduce the handling needed for a traditional grout, but it remains a formulated product with its own instructions. Marketplace terms such as “pipeline wetting agent,” “pump primer powder,” and “pipe lubricant” describe a broad commercial category, not one verified chemistry. Do not infer compatibility, dosage, environmental properties, or concrete acceptance from the product name alone.
The same caution applies to field-made grout. OEM manuals offer model-specific examples, but copying one ratio into another pump and line arrangement can create false confidence. A boom with multiple bends and reducers, a long ground line, a hose-heavy placement, and a short trailer-pump setup do not present the same internal surface area or transition losses.
How much primer is enough?
There is no responsible single quantity for every concrete pump line. REED’s guidance states that the required amount depends on delivery-line length and the material being pumped. Other variables can be equally important:
- internal diameter and total length of pipe and hose;
- the number of bends, reducers, valves, and connection changes;
- whether the system is clean and damp, clean and dry, or contains residual material;
- vertical or downhill sections that can separate the primer from the concrete;
- the concrete’s mortar content, aggregate grading, consistency, and segregation resistance;
- the primer manufacturer’s rated coverage and mixing requirements;
- the amount required to condition the pump outlet and transfer path before the line itself.
A crew planning only from nominal pipeline length can therefore come up short. The line schedule should identify diameter changes, bends, boom sections, ground pipe, hoses, and the planned priming point. For a proprietary product, compare that actual system with the technical data sheet. For cementitious material, confirm the batch and quantity with the pump supplier, concrete supplier, and project procedure rather than relying on an unrecorded rule of thumb.
A controlled startup sequence gives useful diagnostic information
The exact control settings are model-specific, but a technically sound priming plan follows a consistent logic.
- Inspect the complete route. Confirm that pipes and hoses are serviceable, couplings are locked, gaskets are present, and the discharge area is controlled. A leaking joint can remove the fines needed for lubrication.
- Confirm the machine is ready. Check the hopper, agitator, transfer valve, guards, controls, and the OEM pre-operation items. Priming should not be used to test a machine whose mechanical readiness is unknown.
- Prepare the specified primer correctly. Avoid unmixed powder, cement balls, or an improvised consistency. Observe required mixing and waiting time for a packaged product.
- Keep primer ahead of concrete. Load and pump it according to the manual so that production concrete follows without an uncontrolled air gap or interruption. The objective is a continuous transition, not two unrelated batches separated by an empty line.
- Begin under controlled output. Watch pump rhythm and pressure behavior while the primer advances. Do not jump immediately to production output simply because the cylinders are cycling.
- Identify the discharge transition. Keep people clear of the discharge zone and divert the primer and leading material as required. Stable, uniform concrete at the outlet is a better startup indicator than the first appearance of wet material.
- Increase output only after stable flow is established. Record abnormal pressure, leakage, switching, or discharge behavior instead of normalizing a rough startup as “just the prime.”
Starting and restarting a line can eject air, material, or a hose movement unexpectedly. No one should stand in the discharge zone. Never open a pressurized pipeline. If a restriction is suspected, the trained operator must isolate the system and release pressure using the machine manufacturer’s procedure before a clamp or line section is disturbed.
Read the symptoms before blaming the primer—or the pump
| Observation | Possible mechanism | What to verify before deciding |
|---|---|---|
| Pressure rises sharply before steady discharge | Insufficient lubrication, a separated primer slug, an existing restriction, or a developing dry pack | Primer preparation and quantity, line layout, last cleanout condition, discharge progress, and OEM pressure response |
| Wet slurry leaks from a coupling | Missing, damaged, dirty, or poorly seated gasket; clamp or end condition problem | After full depressurization, inspect the gasket, coupling, pipe ends, and evidence of fines loss |
| Primer exits, then coarse or intermittent concrete follows | Poor transition, mix segregation, an air gap, or inadequate pumpability in the first load | Concrete consistency, time between primer and concrete, hopper level, agitator feed, and line geometry |
| One pumping side fills or discharges differently even at low resistance | Pump-side filling, piston sealing, valve alignment, or switching problem | Compare cylinder behavior, hopper feed, valve motion, water-box condition, and recent maintenance history |
| Normal primer discharge but rough switching continues | Transfer-valve or hydraulic switching issue rather than line lubrication alone | Full valve travel, linkage and bearing condition, swing-cylinder response, and model-specific diagnostics |
A priming fault and a worn component can occur at the same time. The Concrete Pump Delivery Cylinders must fill consistently and maintain piston sealing, while the Concrete Pump S-Valve Assembly or Concrete Pump Rock Valve must switch and provide an unobstructed path to the outlet. Excess downstream resistance is reflected back through all of these parts, but a high-pressure startup does not by itself prove that a cylinder or valve is defective.
Conversely, adding more primer cannot correct an incomplete valve shift, severe internal leakage, poor cylinder filling, or hardened buildup. If the system behaves abnormally with a known pumpable mix and a verified prime, the next step is mechanical inspection, not repeated attempts at higher pressure.
Four questions to close out the priming plan
Is water enough to prime a concrete pump?
Do not assume so. ACPA guidance says water priming is not recommended in most cases. Follow the pump manufacturer and project procedure. Uncontrolled water can also alter the leading concrete if it is not separated and discharged properly.
Can the primer go into the structural pour?
That decision belongs to the project specification, engineer, concrete supplier, and primer instructions. Many procedures require primer and the leading transition material to be discharged outside the placement. Treat disposal planning as a pre-pour task, not a decision made when material reaches the hose.
Should a crew force a failed prime with more pump pressure?
No general instruction can make that safe. A rising pressure with no reliable discharge is a warning condition. Stop and follow the OEM blockage and pressure-release procedure. Never loosen a coupling to “see whether it is pressurized.”
What should be recorded after an abnormal startup?
Record the primer product or grout specification, batch quantity, line configuration, first-load concrete data, elapsed times, pressure behavior, discharge appearance, leakage points, and whether one pumping side behaved differently. That record helps a maintenance team distinguish a preparation problem from a valve, cylinder, or hydraulic fault before parts are ordered.
Conclusion
Concrete pump priming is a controlled transition from an empty delivery system to stable concrete flow. Its value comes from conditioning the transfer path and line wall before the first aggregate-rich material arrives—not from adding an unspecified liquid and hoping pressure will solve the rest.
Plan the primer around the actual line, use an approved method, keep it ahead of the concrete, control the discharge, and treat abnormal pressure or switching as diagnostic evidence. That approach reduces dry-pack risk while also making it easier to identify when the real problem lies in the mix, the pipeline, the valve system, or the delivery cylinders.
Technical basis: American Concrete Pumping Association priming and safety guidance; REED and Multiquip concrete-pump operating manuals; and peer-reviewed research on the near-wall lubrication layer in pumped concrete. Always defer to the current instructions for the specific pump, line, primer, and project.